Building a Word Clock
#Arduino #C++
What is a word clock?
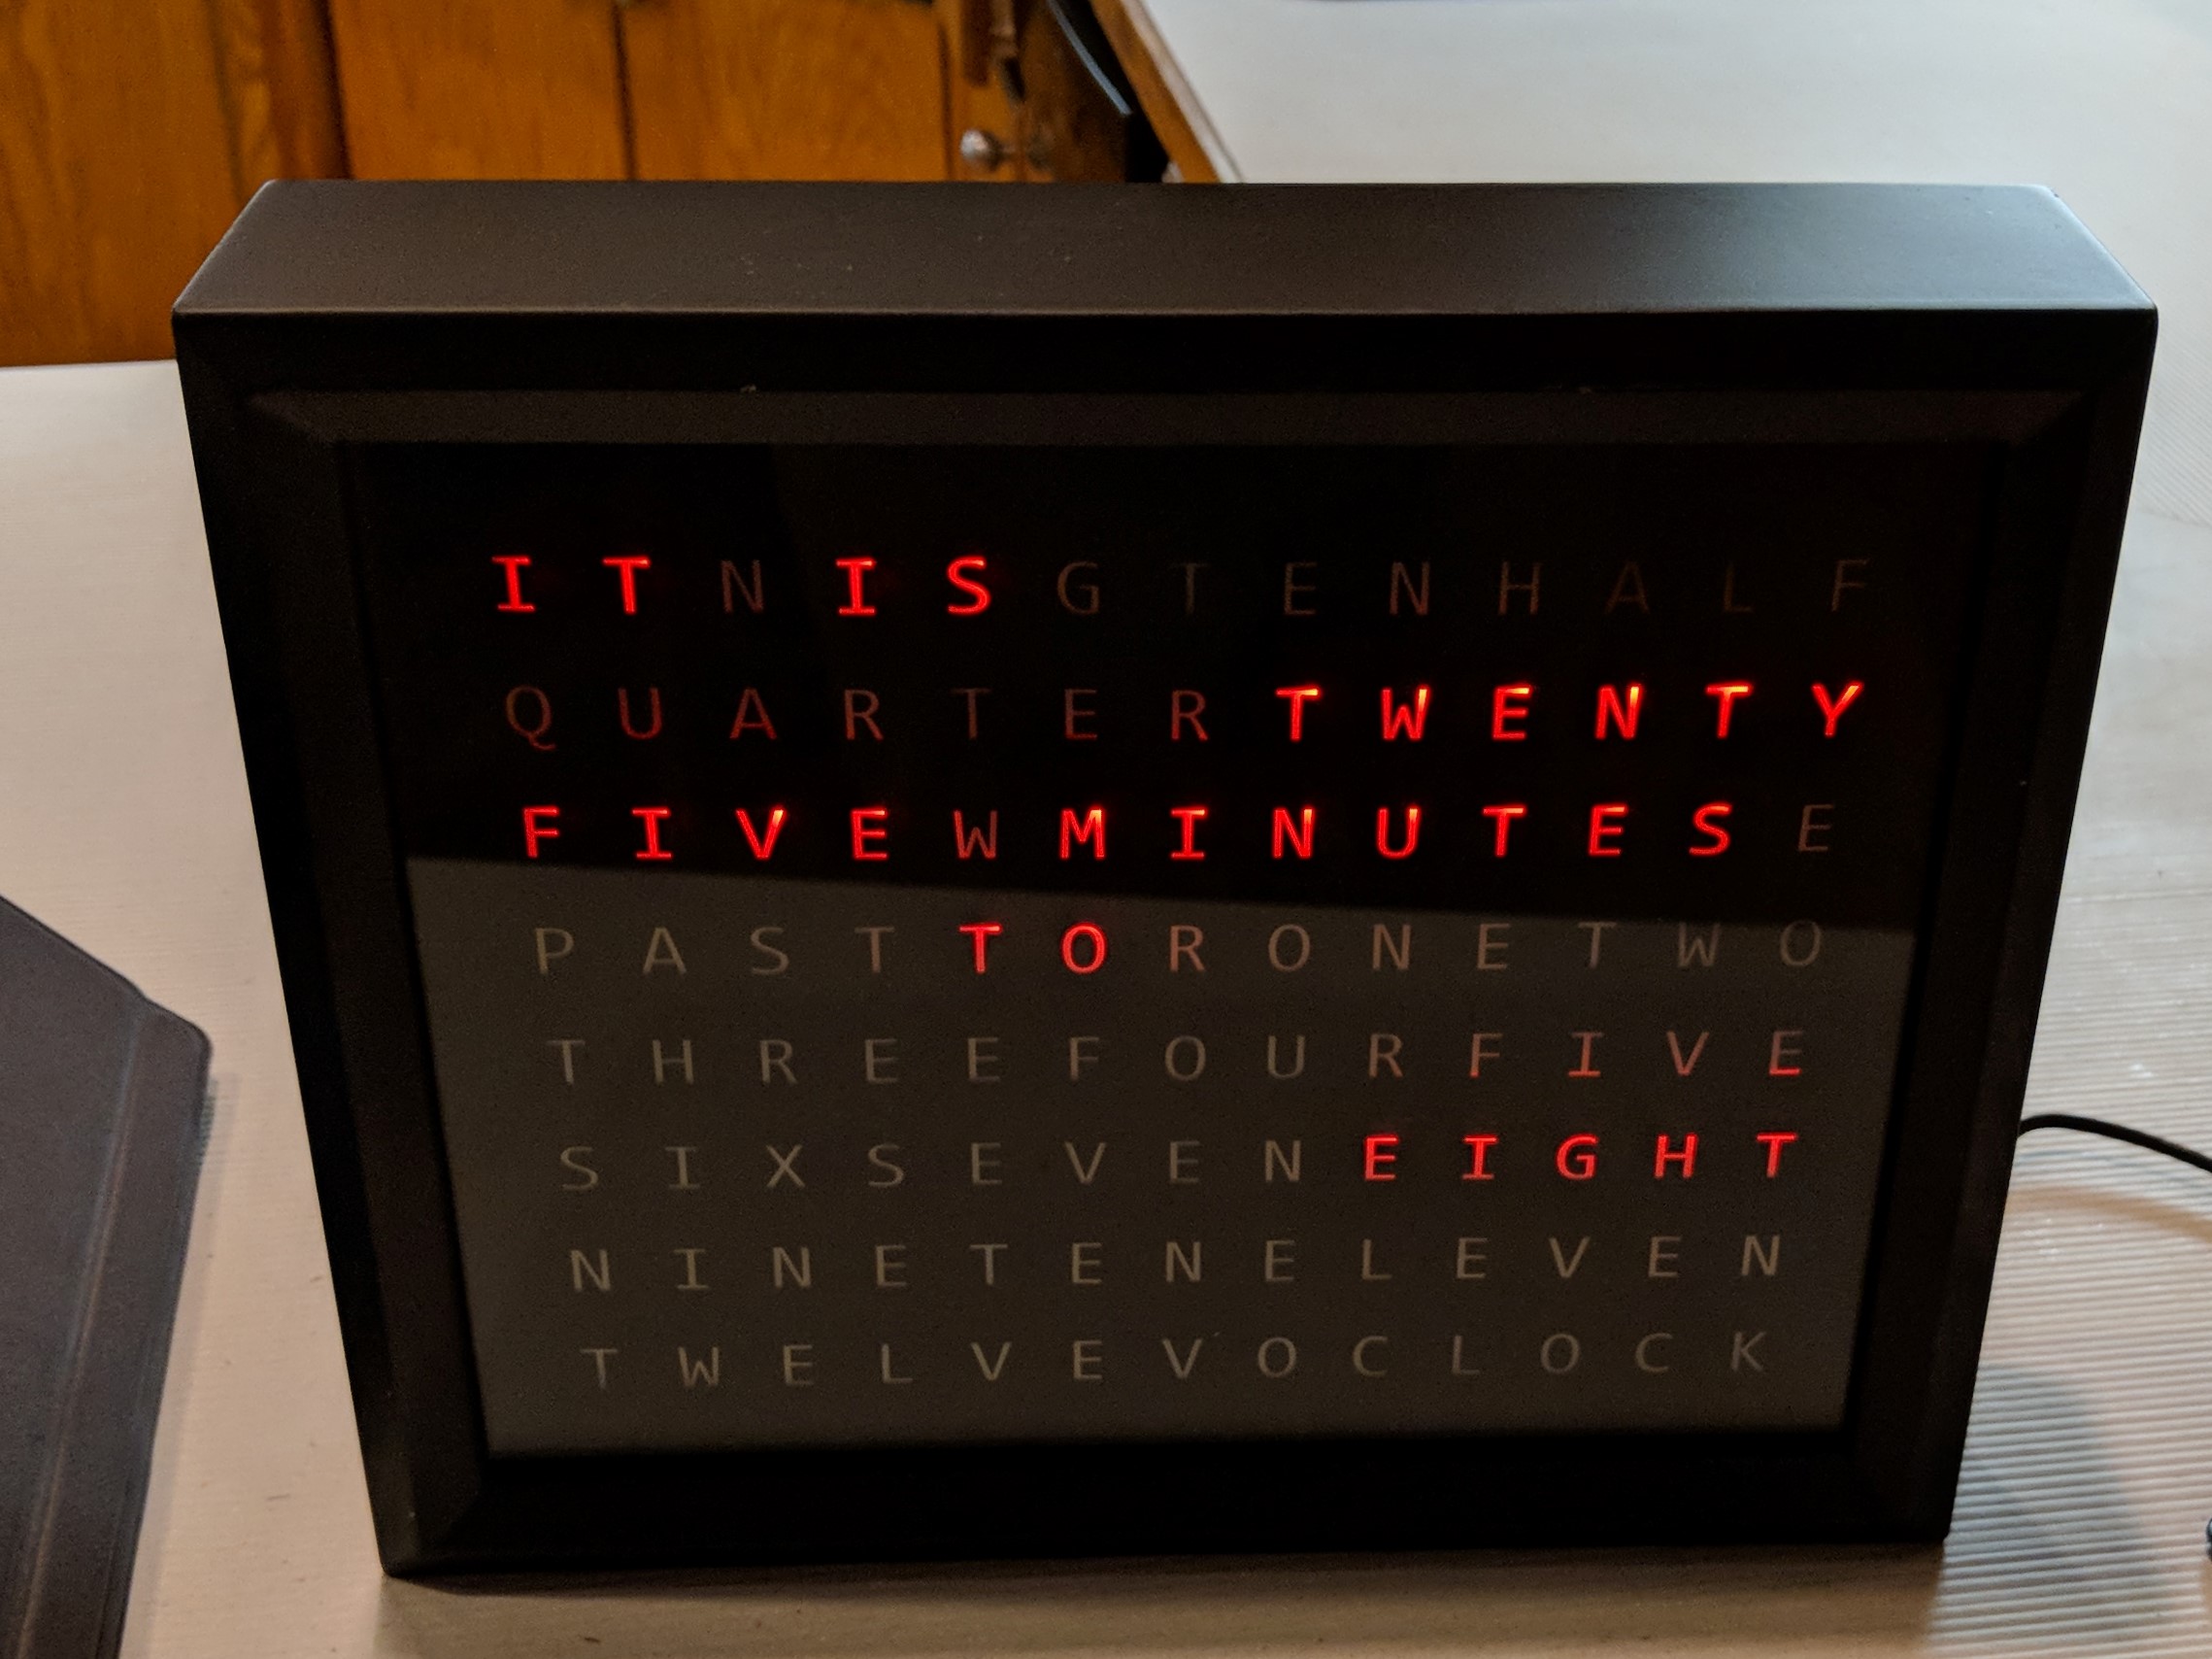
The word clock is a popular amateur electronics project that displays the time in words, rather than with symbols. Traditional clocks, of course, use numbers to give a precise reading of the time. A word clock, on the other hand, lacks the same level of precision, displaying time down to intervals of five minutes. Fpr example, when a digital clock might read “12:15”, a word clock would read “IT IS QUARTER PAST TWELVE”. This past Christmas, while searching for a one-of-a-kind gift that I could give, it crossed my mind as the perfect thing, and I set out to build one.
Materials
I was a little limited on time getting this project done before Christmas, so I didn’t optimize the cost as much as I could have. These components can be bought on the cheap, or if you’re like me and are pressed for time, you can get them on Amazon and pay a premium for the speed. The major electronics components are:
- Arduino Uno compatible board
- DS3231 compatible real-time clock module
- 113 NeoPixel compatible individually addressable LEDs
- Arduino Uno power supply
- Buttons
You’ll need a few resistors and wires, but I’ll assume that you have a fairly standard supply of those around. Along with these electronics, you’ll need an enclosure for the clock - I was originally looking for frames, but found that they lacked the depth that I needed to house the components inside. I ended up getting a shadow box at a local craft store, it fit all the components perfectly and looked good. Finally, you’ll have to get a transparency printed for the LED light to shine through. I suggest using a laser printer for this, and getting a few of them - you may want to stack them on top of each other if one is not thick enough to block the light effectively.
Construction
I started with the LEDs. Having never worked with the NeoPixel library before, I was pleasantly surprised to find how easy it was. My LED strips allowed me to cut them apart to any length I wanted, so I cut eight of them thirteen LEDs long each. I soldered on some wires to each lead, and hooked them up to the pins on the Arduino. I probably could have done this more elegantly, but it was easiest to give each of the strips a separate pin. I then mounted the strips on a scrap piece of cardboard that I had, using a paper copy of the transparency as a guide. I ran the wires around the side of the cardboard, and taped the Arduino to the back of the assembly. Following that, I separated each of the words on the front of the LEDs with little pieces of cardboard and hot glue. This prevents the light from one word bleeding into another word when that subsequent word is supposed to be off. On top of the light-cardboard assembly, I taped some wax paper - this should diffuse the light, making the light behind each word appear more consistent, as though each word is being lit up as a whole rather than each letter.
After getting that assembly together, add the clock module. I wired it into the Arduino according to the spec sheet that came with the component. Following this example I wrote this code, which runs on the Arduino and reads from the clock module.
I wanted to let the user advance the hour and minute manually, in case their time changed - daylight savings, for example. This was accomplished with two buttons, one for each of the hour and minute, and some basic debouncing code to reduce noise. I also implemented a third button for a convenience feature - sleep mode. If this clock was going to be in the bedroom, I knew that the user would probably prefer to darken it at night; thus I added a third button that toggles between three modes - off, sleep, and on. In sleep mode, the LEDs are on during the day and off at night.
Lessons
I’m not totally new to electronics, but this was the first thing that I’ve made that I was giving to someone else. I thus took extra effort to make it stable, and to make the final product look clean. I’m really proud of the final product, and it was very well recieved. If you’re interested in building one, feel free to use my code, and send me a message about how it turns out!